
Area of a Trapezium by mrpettmaths
Loading the math board and drawing, please wait…
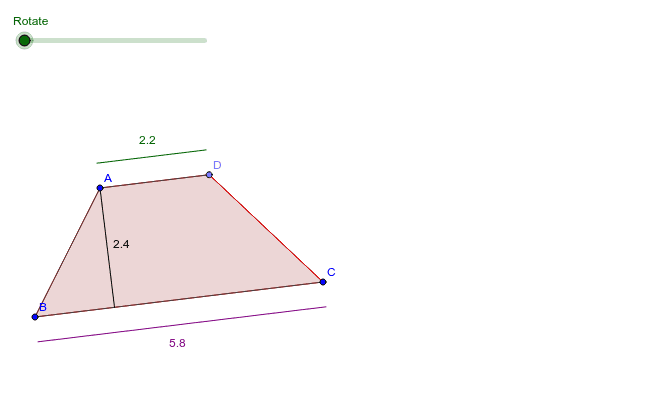
This example demonstrates how to calculate the area of a trapezium by transforming it into a parallelogram. Key concepts include trapezium, parallelogram, and area calculation. Commands used include Line, Polygon, Midpoint, Rotate, Intersect, Translate, etc. Suitable for middle school and above students to learn geometric transformations and area calculation.
GeoGebra Commands & Parameters
Line(C, B) → bLine(A, b) → cPoint(c) → DPolygon(A, B, C, D) → poly1, a_1, b_1, c_1, dMidpoint(c_1) → ERotate(A, α, E) → A'Rotate(B, α, E) → B'Rotate(C, α, E) → C'Rotate(D, α, E) → D'Polygon(A', B', C', D') → poly1', a', b', c', d'OrthogonalLine(A, b_1) → eIntersect(e, b_1) → FCircle(B, (a * (d + b_1))) → fLine(B, b_1) → gIntersect(f, g) → G, HVector(B, F) → uVector(F, A) → vTranslate(H, u) → H'Vector(H, H') → wTranslate(H', v) → H''Vector(H', H'') → hPolygon(H, H', H'') → poly2, h'', h_1, h'Polygon(A, F, C, D) → poly3, a_2, f_1, c_2, d_1Segment(A, F) → iCircle(A, 0.5) → kIntersect(k, e, 2) → ICircle(F, 0.5) → pIntersect(p, b) → J, KVector(F, H') → jVector(F, A) → lTranslate(K, l) → K'Vector(K, K') → mTranslate(I, j) → I'Vector(I, I') → nSegment(K', K) → qVector(A, D) → sTranslate(I, s) → I'_1Vector(I, I'_1) → tSegment(I, I'_1) → rSegment(I'_1, I') → e_1Line(B, i) → g_1Circle(B, 0.5) → k_1Intersect(k_1, g_1, 2) → LVector(B, C) → u_1Translate(L, u_1) → L'Vector(L, L') → v_1Segment(L, L') → i_1
AI Drawing Prompt Reference
Draw a trapezium and transform part of it by rotation and translation to form a parallelogram, demonstrating the area calculation of the trapezium. Key elements include the trapezium, parallelogram, rotated trapezium part, auxiliary lines, and circles. Start by drawing the trapezium, then rotate the midpoint of the top base to connect corresponding points to form the parallelogram. Use circles and lines to find key intersection points, and finally draw auxiliary line segments and arcs to complete the construction and area demonstration.
The prompt above was compiled from the original drawing commands and is for reference only.