
Overflowing Rectangles
Loading the math board and drawing, please wait…
In collections
RectTri Area vs. Perimeter Drafts
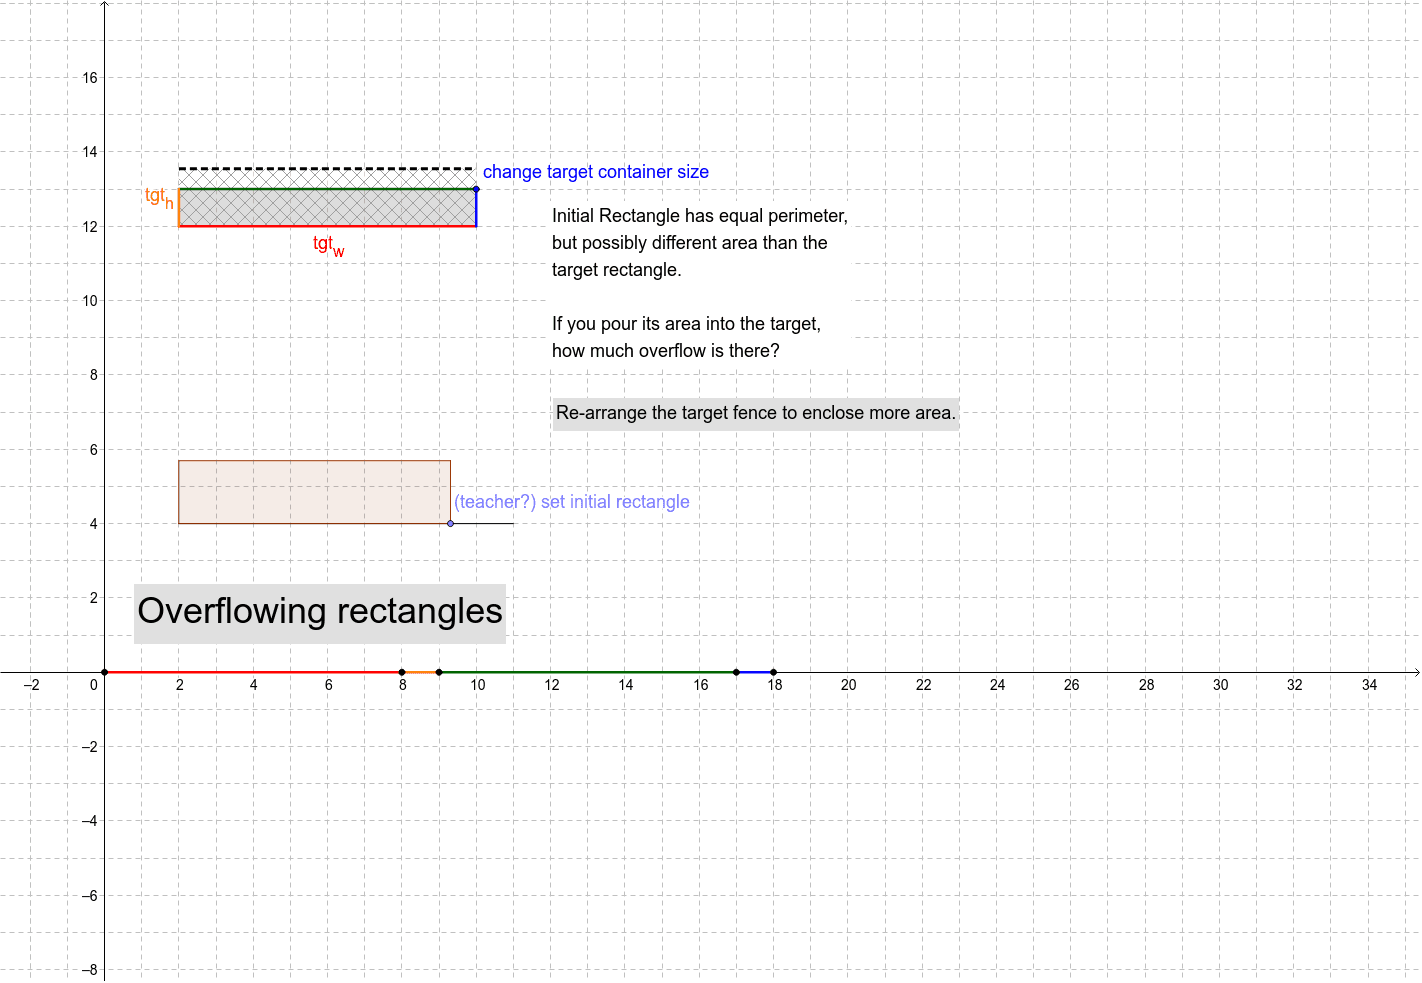
This example demonstrates how an initial rectangle with the same perimeter as the target rectangle may have a different area. By pouring the area of the initial rectangle into the target, observe the overflow. Key mathematical concepts include geometric construction, area calculation, and geometric transformations. GeoGebra commands used include OrthogonalLine, Intersect, Polygon, and others. Suitable for middle school and above students to learn about geometric transformations and area calculation.
GeoGebra Commands & Parameters
OrthogonalLine(C, xAxis) → aOrthogonalLine(C, yAxis) → bOrthogonalLine(A, xAxis) → cOrthogonalLine(A, yAxis) → dIntersect(b, c) → BIntersect(a, d) → DPolygon(A, D, C, B) → tgtRectangle, tgt_w, d_1, c_1, tgt_hIntersect(xAxis, yAxis) → EPoint(Circle[E, tgt_w]) → FSegment(E, F) → ePoint(Circle[F, tgt_h]) → GSegment(F, G) → fPoint(Circle[G, c_1]) → HSegment(G, H) → gPoint(Circle[H, d_1]) → ISegment(H, I) → hCircle(J, tgtPerim / 2) → kLine(J, xAxis) → jIntersect(k, j, 2) → KSegment(J, K) → lPoint(l) → LCircle(L, K) → pOrthogonalLine(L, l) → mIntersect(p, m, 2) → MOrthogonalLine(M, yAxis) → nOrthogonalLine(J, l) → qIntersect(n, q) → NPolygon(J, L, M, N) → PouringRectangle, j_1, l_1, m_1, n_1Circle(D, newAreaHeight) → rIntersect(r, a) → P, QOrthogonalLine(Q, a) → sIntersect(c, s) → RSegment(R, Q) → tPolygon(A, D, Q, R) → pouredAreaRectangle, a_2, d_2, q_1, r_1
AI Drawing Prompt Reference
Draw an initial rectangle with the same perimeter as the target rectangle but a different area. Adjust the length and width of the initial rectangle to observe how its area is poured into the target rectangle, causing overflow. First, draw two sides of the initial rectangle perpendicular to the coordinate axes, then construct the target rectangle. Next, adjust the dimensions of the target rectangle to see how the overflow area forms a new rectangle.
The prompt above was compiled from the original drawing commands and is for reference only.