
IM 6.1.8 Lesson: Triangle Area - Activity 2
Loading the math board and drawing, please wait…
In collections
Grade 6 Unit 1: Area and Surface Area
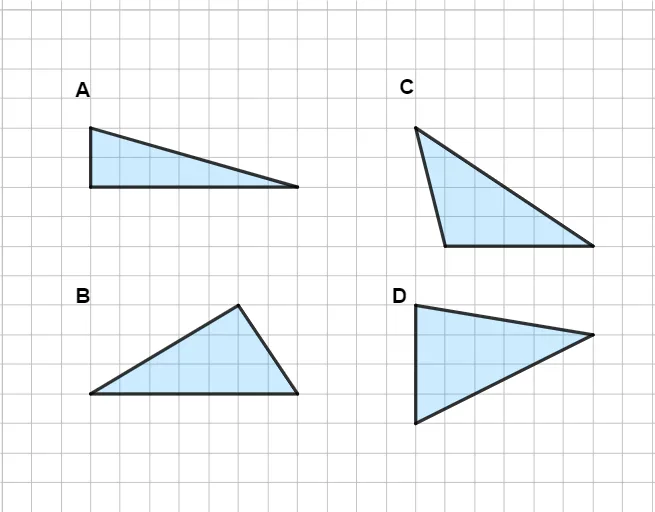
This GeoGebra example demonstrates the construction of a triangle and the calculation of its area, illustrating the base‑height formula through interactive geometry. Core concepts include triangle area, geometric construction, and coordinate geometry with points and segments. The construction uses the Segment command to draw edges, the Polygon command to create the triangle polygon, and a CustomTriangle object for custom triangle definitions, involving vertices A, B, C and auxiliary points D, E, F, etc. It is suitable for middle‑school geometry lessons (grades 6‑8) and for teacher presentations or student exploration of triangle area properties.
GeoGebra Commands & Parameters
Segment(A, B) → fSegment(B, C) → gSegment(C, A) → hPolygon(A, C, B) → t1, b, a, cSegment(D, E) → iSegment(E, F) → jSegment(F, G) → kSegment(G, D) → lPolygon(D, E, F, G) → q1, d, e, f_1, g_1Segment(H, I) → mSegment(I, J) → nSegment(J, K) → pSegment(K, L) → qSegment(L, H) → rPolygon(H, I, J, K, L) → poly1, h_1, i_1, j_1, k_1, l_1Segment(M, N) → sSegment(N, O) → tSegment(O, P) → m_1Segment(P, Q) → n_1Segment(Q, R) → p_1Segment(R, M) → q_1Polygon(R, M, N, O, P, Q) → poly2, r_1, m_2, n_2, o, p_2, q_2Segment(S, T) → s_1Segment(T, U) → t_1Segment(U, V) → a_1Segment(V, W) → b_1Segment(W, Z) → c_1Segment(Z, A_1) → d_1Segment(A_1, S) → e_1Polygon(S, T, U, V, W, Z, A_1) → poly3, s_2, t_2, u, v, w, z_1, f_2Segment(B_1, C_1) → g_2Segment(C_1, D_1) → h_2Segment(D_1, E_1) → i_2Segment(E_1, F_1) → j_2Segment(F_1, G_1) → k_2Segment(G_1, H_1) → l_2Segment(H_1, I_1) → r_2Segment(I_1, B_1) → a_2Polygon(B_1, C_1, D_1, E_1, F_1, G_1, H_1, I_1) → poly4, b_2, c_2, d_2, e_2, f_3, g_3, h_3, i_3Segment(J_1, K_1) → j_3Segment(K_1, L_1) → k_3Segment(L_1, M_1) → l_3Segment(M_1, N_1) → m_3Segment(N_1, O_1) → n_3Segment(O_1, P_1) → p_3Segment(P_1, Q_1) → q_3Segment(Q_1, R_1) → r_3Segment(R_1, J_1) → s_3Polygon(R_1, J_1, K_1, L_1, M_1, N_1, O_1, P_1, Q_1) → poly5, t_3, a_3, b_3, c_3, d_3, e_3, o_1, f_4, g_4Segment(S_1, T_1) → h_4Segment(T_1, U_1) → i_4Segment(U_1, V_1) → j_4Segment(V_1, W_1) → k_4Segment(W_1, Z_1) → l_4Segment(Z_1, A_2) → m_4Segment(A_2, B_2) → n_4Segment(B_2, C_2) → p_4Segment(C_2, D_2) → q_4Segment(D_2, S_1) → r_4Polygon(S_1, T_1, U_1, V_1, W_1, Z_1, A_2, B_2, C_2, D_2) → poly6, s_4, e_4, t_4, u_1, v_1, w_1, a_4, b_4, c_4, d_4CustomTriangle(E_2, F_2, G_2) → f_5, g_5, h_5, t2CustomTriangle(H_2, I_2, J_2) → i_5, j_5, k_5, t3CustomTriangle(K_2, L_2, M_2) → l_5, m_5, n_5, t4CustomTriangle(N_2, O_2, P_2) → p_5, q_5, r_5, t5
AI Drawing Prompt Reference
In a coordinate plane, first draw a triangle by choosing three vertices and connecting them pairwise to form its three sides, then create the triangular polygon as a closed filled region. Next, inside (or near) the triangle, draw another closed quadrilateral polygon by constructing a connected boundary made from four consecutive vertices and joining them in order. After that, add a separate closed polygon region formed by five consecutive vertices connected by line segments in sequence. Finally, overlay an additional closed polygon region defined by eight consecutive vertices, connecting adjacent vertices with segments and closing the loop to complete the boundary.
The prompt above was compiled from the original drawing commands and is for reference only.