
Geometric Properties of a Rhombus
Loading the math board and drawing, please wait…
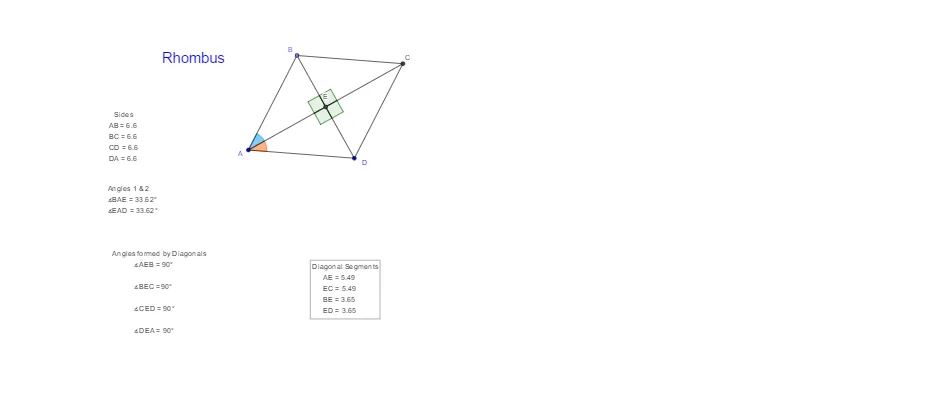
This example uses dynamic geometric construction to demonstrate and visually verify key properties of a rhombus. It focuses on relationships involving its diagonals and angles, connecting rhombus structure to isosceles-triangle angle facts and orthogonality checks (often supported by circle/line constructions). Core concepts include rhombus properties such as equal sides, diagonal midpoint behavior, and diagonal perpendicularity, along with angle congruence verification. Construction in GeoGebra: Segment is used to create sides/diagonals; Point defines vertices and key locations; Line and Circle establish supporting lines and circles; Midpoint creates diagonal midpoints to support symmetry reasoning; OrthogonalLine builds perpendicular lines to confirm orthogonality; Intersect computes intersection points of constructed objects; Angle is used to measure and label important angles (α, β, γ, δ, etc.) for property validation. Suitable for middle and high school geometry, classroom demonstrations, and exploratory practice for students learning geometric proofs through visualization.
GeoGebra Commands & Parameters
Segment(A, D) → aCircle(A, D) → cPoint(c) → BLine(B, a) → bSegment(A, B) → dSegment(B, D) → eMidpoint(B, D) → EOrthogonalLine(E, e) → fIntersect(b, f) → CSegment(B, C) → gSegment(C, D) → hSegment(A, E) → iSegment(E, C) → jSegment(B, E) → kSegment(E, D) → lAngle(A, E, B) → αAngle(B, E, C) → βAngle(C, E, D) → γAngle(B, A, E) → δAngle(D, A, E) → εAngle(D, E, A) → ζ
AI Drawing Prompt Reference
Draw a rhombus ABCD with points A, B, C, and D as vertices. First, draw diagonals AD and BD. Then, use A and D as centers to draw circles and determine point B. Draw line AB and extend it to intersect the circle centered at D at point C. Connect BC, CD, AE, EC, BE, and ED, where E is the midpoint of BD. Finally, measure and label the angles ∠AEB, ∠BEC, ∠CED, ∠AEB, ∠AED, and ∠CED to verify the properties of the rhombus.
The prompt above was compiled from the original drawing commands and is for reference only.