
Triangle Rotation Tessellation Step 3: Make First Side of the Tile by M.Towne
Loading the math board and drawing, please wait…
In collections
Real Triangle Rotation Tessellation Math 206 by Marie Towne
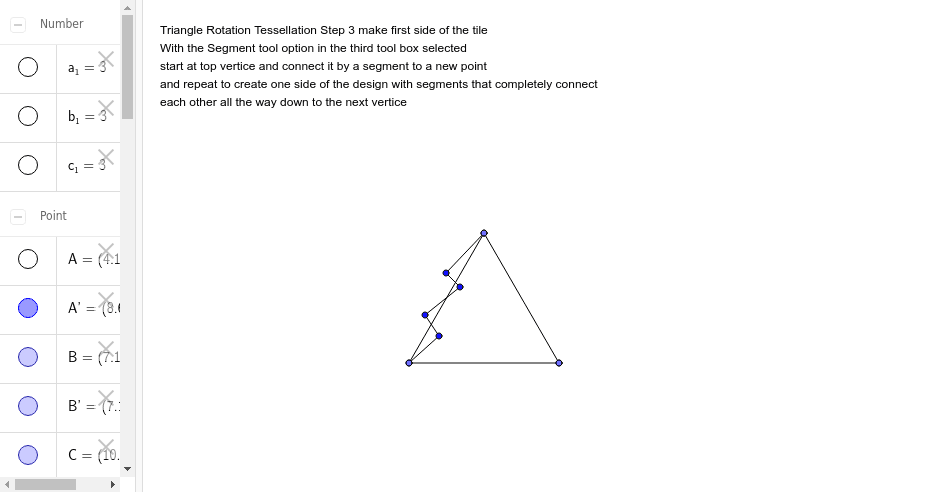
This example demonstrates the third step in creating a triangle rotation tessellation, focusing on drawing the first side of the tile. Key math concepts include rotation, polygon construction, and geometric transformations. It utilizes GeoGebra commands and objects such as Point, Segment, and Rotate to precisely construct and rotate the shapes. Suitable for middle school and above students learning geometric transformations and tessellation patterns.
GeoGebra Commands & Parameters
Point(Circle[A, 3]) → BSegment(A, B) → aPoint(Circle[B, 3]) → CSegment(B, C) → bPoint(Circle[C, 3]) → DSegment(C, D) → cRotate(A, -120*°, B) → A'Rotate(B, -120*°, B) → B'Segment(A', B') → a'Rotate(C, 120*°, C) → C'Rotate(D, 120*°, C) → D'Segment(C', D') → c'Segment(A', E) → dSegment(E, F) → eSegment(F, G) → fSegment(G, H) → gSegment(H, B) → h
AI Drawing Prompt Reference
Draw the third step of a triangle rotation tessellation, focusing on creating the first side of the tile. Start by drawing a circle centered at a point with radius 3 to get a second point, then connect the two points to form a line segment. Next, draw a circle centered at the second point to get a third point, and connect these two points to form another line segment. Repeat this process to get a fourth point and connect it to the third point. Then, rotate the first point around the second point by -120 degrees to get a new point, and connect these two points. Rotate the third point around itself by 120 degrees to get another new point, and connect these two points. Finally, connect the rotated first point to the original center, and sequentially connect the adjacent points to complete the shape.
The prompt above was compiled from the original drawing commands and is for reference only.