
Rhombus Investigation Template by Tim Brzezinski
Loading the math board and drawing, please wait…
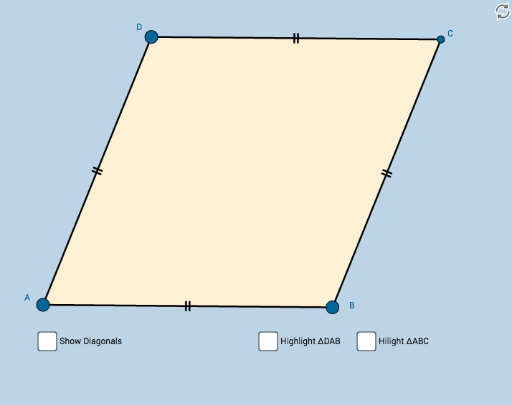
This example demonstrates the geometric properties of a rhombus, including its sides, angles, and diagonals. Key math concepts involved are equal sides, perpendicular and bisecting diagonals, and angle bisectors. Construction highlights use of GeoGebra commands like Circle, Point, Intersect, Segment, Midpoint, Angle, Polygon, and Mirror. Suitable for middle school and above students to explore rhombus properties and geometric constructions.
GeoGebra Commands & Parameters
Circle(A, B) → cPoint(c) → DCircle(B, A) → dCircle(D, A) → eIntersect(d, e, 2) → CSegment(A, B) → aSegment(B, C) → bSegment(C, D) → fSegment(D, A) → gMidpoint(A, C) → ESegment(D, E) → hSegment(E, B) → iSegment(C, E) → jSegment(E, A) → kAngle(D, C, E) → αAngle(E, C, B) → βAngle(B, A, E) → γAngle(E, A, D) → δAngle(C, B, E) → εAngle(E, B, A) → ζAngle(E, D, C) → ηAngle(A, D, E) → θAngle(C, E, D) → ιPolygon(A, B, C) → poly1, c_1, a_1, b_1Mirror(A, k) → A'Mirror(B, k) → B'Mirror(C, k) → C'Polygon(A', B', C') → poly1', c', a', b'Polygon(D, A, B) → poly2, b_2, d_1, a_2Mirror(D, h) → D'Mirror(A, h) → A'_1Mirror(B, h) → B'_1Polygon(D', A'_1, B'_1) → poly2', b'_1, d', a'_1Polygon(A, B, C, D) → poly3, a_3, b_3, c_2, d_2Segment(D, B) → sSegment(A, C) → t
AI Drawing Prompt Reference
Draw a rhombus to demonstrate its equal sides, perpendicular and bisecting diagonals, and angle bisectors. Start by drawing two intersecting circles to find the vertices of the rhombus, then connect them to form the shape. Next, locate the midpoints of the diagonals, draw them to show they are perpendicular and bisect each other. Finally, use an angle bisector tool to draw the bisectors of each angle and label the key angles.
The prompt above was compiled from the original drawing commands and is for reference only.