
Rhombus Construction Applet
Loading the math board and drawing, please wait…
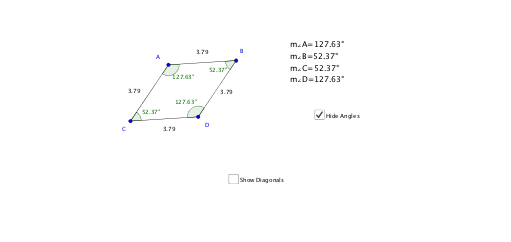
This GeoGebra applet demonstrates the construction of a rhombus. Key mathematical concepts include the properties of a rhombus, translation, and geometric mean. Using commands such as Line, Circle, Point, Intersect, Segment, and Angle, users can dynamically explore the geometric properties of a rhombus. Suitable for middle school and above students and teachers.
GeoGebra Commands & Parameters
Line(A, B) → fCircle(A, B) → cPoint(c) → CLine(C, f) → gLine(A, C) → hLine(B, h) → iIntersect(g, i) → DSegment(A, B) → jSegment(A, C) → kSegment(C, D) → mSegment(D, B) → nSegment(A, D) → lSegment(C, B) → pAngle(l, p) → αIntersect(l, p) → ESegment(A, E) → qSegment(B, E) → rSegment(D, E) → sSegment(C, E) → tAngle(A, B, D) → βAngle(C, A, B) → γAngle(D, C, A) → δAngle(B, D, C) → ε
AI Drawing Prompt Reference
Draw a rhombus to demonstrate its construction. Start with a line segment, then draw a circle with the segment as the diameter. The intersection of the circle with the line segment is a vertex. Connect this vertex to the endpoints of the segment to form two intersecting lines, and the intersection point is another vertex of the rhombus. Complete the rhombus by connecting the remaining vertices. Label the intersection of the diagonals, draw all four sides, and measure and label the angles between the diagonals and the vertices.
The prompt above was compiled from the original drawing commands and is for reference only.