
Fermat Point Construction by Bernat
Loading the math board and drawing, please wait…
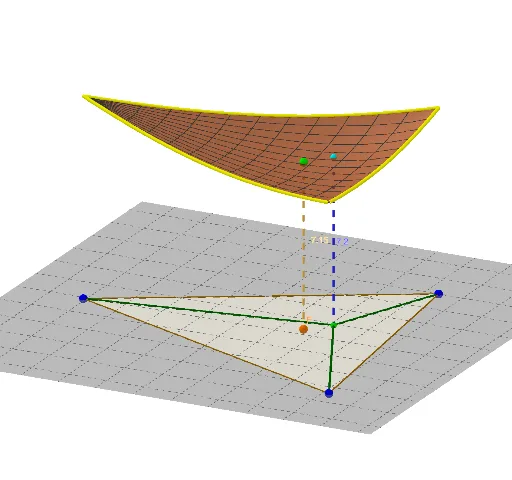
This example demonstrates the geometric construction and properties of the Fermat point. It involves core mathematical concepts such as triangles, coordinate geometry, and geometric construction. Key GeoGebra commands used include Polygon, Ray, Intersect, PointIn, Segment, CurveCartesian, and Surface to create triangles, rays, intersections, segments, curves, and surfaces. Suitable for high school and above students exploring geometric optimization problems.
GeoGebra Commands & Parameters
Polygon(A, B, C) → tri1, c, a, bPolygon(B, C, 3, xOyPlane) → pol1, f, g, h, T_1Polygon(A, B, 3, xOyPlane) → pol2, i, j, k, T_2Polygon(C, A, 3, xOyPlane) → pol3, l, m, n, T_3Ray(T_2, C) → pRay(T_1, A) → qRay(T_3, B) → rIntersect(p, q) → FPointIn(tri1) → DSegment(D, B) → s_2Segment(D, C) → s_3Segment(D, A) → s_1Segment(F, E) → sSegment(D, G) → tCurveCartesian(x(A) + (k * (x(B) - x(A))), y(A) + (k * (y(B) - y(A))), 0, k, 0, 1) → eSurface((k * e(t)) + ((1 - k) * C), k, 0, 1, t, 0, 1) → oSurface((t * (x(A) + (k * (x(B) - x(A))))) + ((1 - t) * x(C)), (t * (y(A) + (k * (y(B) - y(A))))) + ((1 - t) * y(C)), ss((t * (x(A) + (k * (x(B) - x(A))))) + ((1 - t) * x(C)), (t * (y(A) + (k * (y(B) - y(A))))) + ((1 - t) * y(C))), k, 0, 1, t, 0, 1) → uCurveCartesian(x(A) + (k * (x(B) - x(A))), y(A) + (k * (y(B) - y(A))), ss(x(A) + (k * (x(B) - x(A))), y(A) + (k * (y(B) - y(A)))), k, 0, 1) → vCurveCartesian(x(A) + (k * (x(C) - x(A))), y(A) + (k * (y(C) - y(A))), ss(x(A) + (k * (x(C) - x(A))), y(A) + (k * (y(C) - y(A)))), k, 0, 1) → wCurveCartesian(x(B) + (k * (x(C) - x(B))), y(B) + (k * (y(C) - y(B))), ss(x(B) + (k * (x(C) - x(B))), y(B) + (k * (y(C) - y(B)))), k, 0, 1) → a_1
AI Drawing Prompt Reference
Draw a triangle and extend rays from each vertex to the opposite side. The intersection of these rays is the Fermat point. Connect the point inside the triangle to each vertex, forming three segments. Also, draw three segments connecting the Fermat point to each vertex. Finally, use curves and surfaces to show the interpolation effect of the triangle, giving the image a three-dimensional appearance.
The prompt above was compiled from the original drawing commands and is for reference only.