
Translation of a Triangle: Vector Translation and Linear Equations
Loading the math board and drawing, please wait…
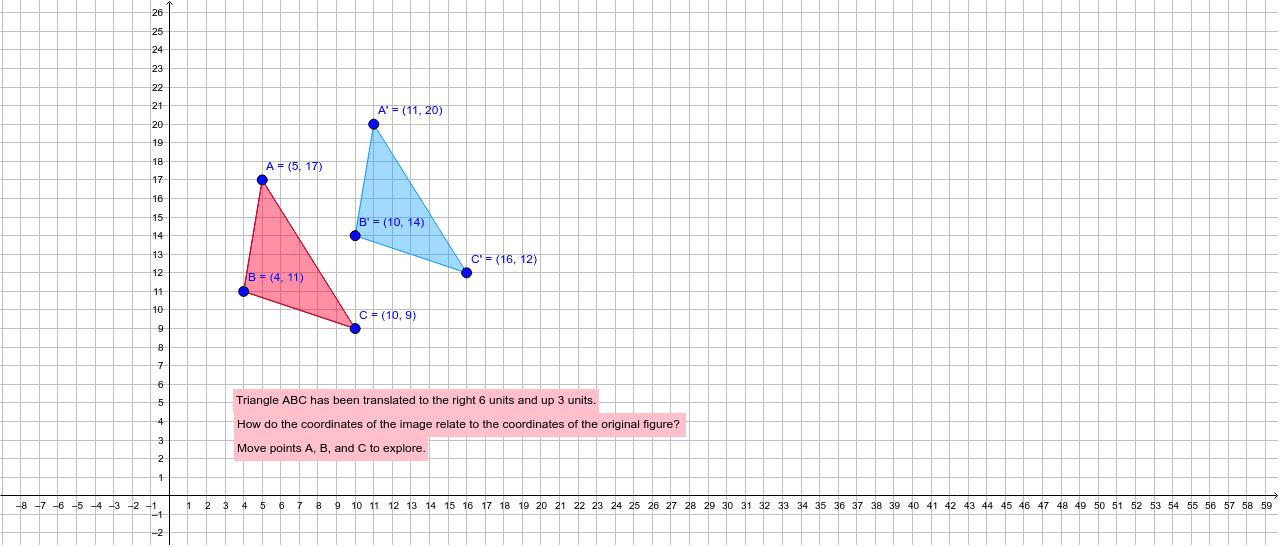
This example demonstrates how to translate a triangle to a new position using a vector, and observe the correspondence between the original and translated figures, including vertices and sides. The core mathematical concepts are translation in plane geometry, vectors, and linear equations that describe the direction and magnitude of the shift. Construction highlights: use Segment, Polygon commands to build the original triangle ABC, define a translation vector u with the Vector command, then apply the Translate command to the triangle and its sides to generate the translated triangle A'B'C' and corresponding sides a', b', c', while keeping the original objects for comparison. Suitable for middle or high school students learning geometric transformations, introductory vectors, and dynamic geometry, as well as for teachers demonstrating the visual effect of translation in class.
GeoGebra Commands & Parameters
Segment(A, B) → aSegment(C, B) → bSegment(A, C) → cPolygon(A, B, C) → poly1, c_1, a_1, b_1Vector(D, E) → uTranslate(A, u) → A'Translate(B, u) → B'Translate(C, u) → C'Polygon(A', B', C') → poly1', c', a', Triangle
AI Drawing Prompt Reference
Draw a triangle and translate it along a given vector to a new position. First, construct the original triangle with three sides. Then, create a vector from one point to another to indicate the direction and magnitude of translation. Next, translate each of the three original vertices by the vector to obtain three new points, and use these points to form the translated triangle. Keep the original triangle and its sides visible for comparison.
The prompt above was compiled from the original drawing commands and is for reference only.