
Solving Right Triangles by chermann2.10
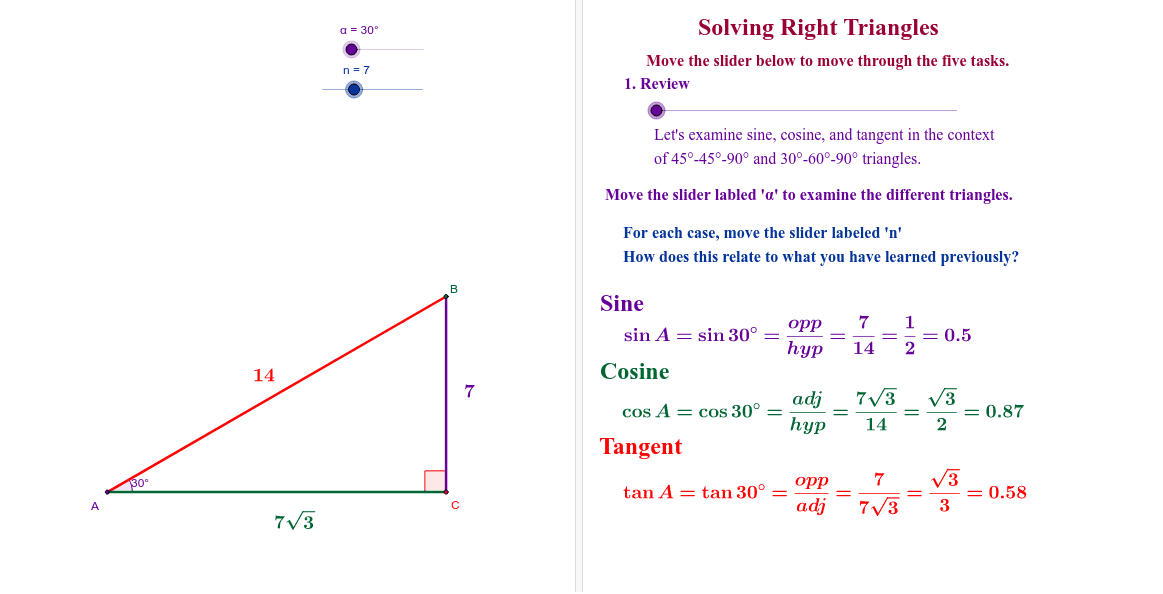
Loading the math board and drawing, please wait…
This example demonstrates how students can use GeoGebra to create right triangles and explore the meanings of inverse sine, inverse cosine, and inverse tangent functions. It involves core mathematical concepts such as right triangles, trigonometric functions, angle measurement, and inverse operations. The construction highlights GeoGebra commands and objects like Intersect, Segment, Angle, Polygon, Midpoint, and Rotate. Suitable for high school mathematics education, it helps students visually understand the application of inverse trigonometric functions in geometric problems.
GeoGebra Commands & Parameters
Intersect(xAxis, yAxis) → ASegment(A, B) → c_2Segment(A, C) → b_2Segment(B, C) → a_2Angle(C, A, B) → βAngle(B, C, A) → δPolygon(G, H, I) → poly2, i_1, g_4, h_4Angle(I, H, G) → εPolygon(D, E, F) → poly1, f_1, d_1, e_1Angle(F, D, E) → γPolygon(J, K, 3) → poly3, j_1, k_2, l_2, LMidpoint(J, K) → MPolygon(K, M, L) → poly4, l_1, k_1, m_1Polygon(N, O, P) → poly5, p_1, n_1, o_1Angle(K, M, L) → ζAngle(N, O, P) → ηAngle(L, K, M) → θAngle(D, E, F) → ιPolygon(G_1, H_1, I_1) → poly2_1, i_2, g_5, h_5Angle(I_1, H_1, G_1) → ε_1Rotate(G_1, 90*°, Q) → RRotate(H_1, 90*°, Q) → SRotate(I_1, 90*°, Q) → TPolygon(R, S, T) → poly6, t_1, r_1, s_1Angle(T, S, R) → κSegment(U, V) → a_1Rotate(D, 180*°, W) → D'Rotate(E, 180*°, W) → E'Rotate(F, 180*°, W) → F'Polygon(D', E', F') → poly1', f', d', e'Angle(F', D', E') → λAngle(E', F', D') → μAngle(D', E', F') → νAngle(R, T, S) → ξAngle(S, R, T) → ο
AI Drawing Prompt Reference
Draw a right triangle with labeled legs and hypotenuse, and display its three interior angles. Then, construct the sine, cosine, and tangent functions corresponding to these angles, showing their relationships with the triangle. Next, create an isosceles right triangle, rotate it 90 degrees to form another triangle, and observe the changes. Finally, reflect the original triangle 180 degrees to compare its shape and angle relationships with the reflected version.
The prompt above was compiled from the original drawing commands and is for reference only.