
Rectangle Construction and Perpendicular Relationship Demonstration
Loading the math board and drawing, please wait…
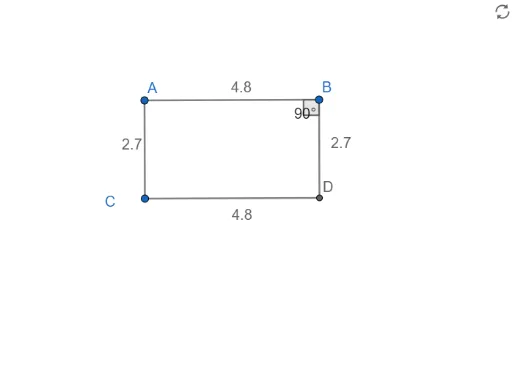
This GeoGebra example demonstrates how to construct a rectangle and visually illustrates that its adjacent sides are perpendicular while its opposite sides are parallel. The core mathematical concepts involved include polygons (rectangles), angles (right angles), and the properties and criteria of perpendicular and parallel lines in Euclidean plane geometry. The construction uses GeoGebra commands Segment, OrthogonalLine, Point, Line, Intersect, and Angle, together with objects A, B, C, D, lines f, g, h, i, j, k, l, and angle α to position the rectangle’s vertices and draw its sides. It is appropriate for middle school geometry instruction, teacher-led classroom demonstrations, and independent student exploration of planar figure construction and property verification.
GeoGebra Commands & Parameters
Segment(A, B) → fOrthogonalLine(A, f) → gOrthogonalLine(B, f) → hPoint(g) → CLine(C, f) → iIntersect(h, i) → DSegment(C, D) → jSegment(D, B) → kSegment(A, C) → lAngle(A, B, D) → α
AI Drawing Prompt Reference
Draw a line segment as one side of a rectangle. At each endpoint of the segment, construct a perpendicular line. Choose a point on one of these perpendicular lines. Through that point, draw a line parallel to the original segment. Let this parallel line meet the other perpendicular line at a fourth point. Connect the four points to form the rectangle, and mark the angle at one endpoint of the original segment between the original segment and the adjacent side, showing that adjacent sides are perpendicular and opposite sides are parallel.
The prompt above was compiled from the original drawing commands and is for reference only.