
Perpendicular Bisector of a Line Segment: Construction and Properties
Loading the math board and drawing, please wait…
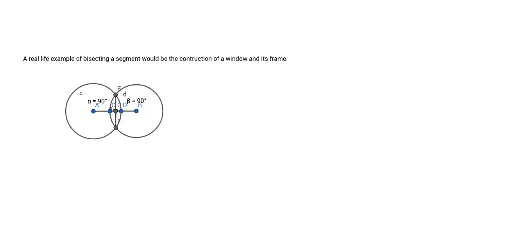
This GeoGebra example dynamically demonstrates how to construct the perpendicular bisector of a line segment and visually verifies its key property: every point on the bisector is equidistant from the segment's endpoints. The core mathematical concepts involved include the midpoint of a segment, perpendicularity, intersections of circles, and angle measurement. The construction steps are: create segment AB using the Segment command, mark endpoints with Point; draw two circles centered at A and B with equal radii using the Circle command; find their intersection points C and D via the Intersect command; connect C and D with a Segment to form the perpendicular bisector; finally, use the Angle command to measure angles α and β to confirm the right angles, and add text1 for labeling. This example is suitable for middle school geometry lessons to illustrate the definition and properties of perpendicular bisectors, and can also serve as an introductory exercise for geometric construction or as a foundation for deriving line equations in coordinate geometry.
GeoGebra Commands & Parameters
Segment(A, B) → fPoint(f) → CPoint(f) → DCircle(A, Segment[A, D]) → cCircle(B, Segment[C, B]) → dIntersect(c, d, 1) → EIntersect(c, d, 2) → FSegment(E, F) → gIntersect(f, g) → GAngle(D, G, E) → αAngle(E, G, C) → β
AI Drawing Prompt Reference
Draw a horizontal line segment with two endpoints. Pick two arbitrary points on the segment. Construct a circle centered at the left endpoint with radius equal to the distance to one of those points, and another circle centered at the right endpoint with radius equal to the distance to the other point. The two circles intersect at two points above and below the segment. Connect these two intersection points with a straight line, which crosses the original segment at its midpoint. Finally, measure and label the two angles formed between this line and the segment, showing they are right angles, and add a text label indicating this line is the perpendicular bisector.
The prompt above was compiled from the original drawing commands and is for reference only.