
Day 5: Rhombus Construction and Symmetry Exploration
Loading the math board and drawing, please wait…
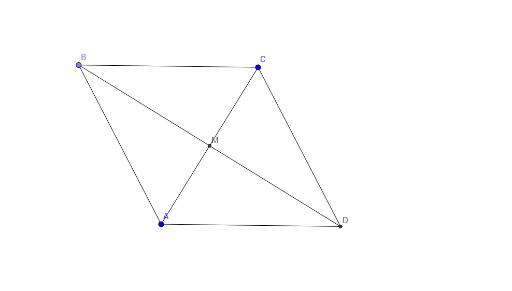
This example demonstrates how to construct a rhombus through geometric construction, then explore its properties using symmetry, equilateral triangles, and arithmetic mean concepts. Core mathematical concepts include the definition and properties of a rhombus, axial symmetry, angle relations in equilateral triangles, combinatorial counting, and average ideas from calculus. The construction uses GeoGebra commands: Segment to draw base edges, LineBisector to create symmetry axes, Point and Circle to determine intersections, and Intersect to generate the rhombus vertices. Key objects include A, C, f, g, B, c, D, h, i, j, k, l, M, where M likely serves as a symmetry center or midpoint. This example is suitable for middle or high school geometry classes to understand rhombus construction, symmetry applications, and multi-concept integration, and can also serve as material for math competitions or inquiry-based learning.
GeoGebra Commands & Parameters
Segment(A, C) → fLineBisector(f) → gPoint(g) → BCircle(A, B) → cIntersect(c, g, 2) → DSegment(A, B) → hSegment(B, C) → iSegment(C, D) → jSegment(D, A) → kSegment(B, D) → lIntersect(f, l) → M
AI Drawing Prompt Reference
Draw a rhombus by first creating a line segment between points A and C as the base, then draw the perpendicular bisector of this segment to locate point B as another vertex. Use points A and B as centers to draw circles, and their intersection gives point D, completing the four vertices of the rhombus. Connect these points to form the four sides of the rhombus, and find the midpoint M of the base as the symmetry center.
The prompt above was compiled from the original drawing commands and is for reference only.