
Rotating Around Points: GeoGebra Beginner Exercise 17
Loading the math board and drawing, please wait…
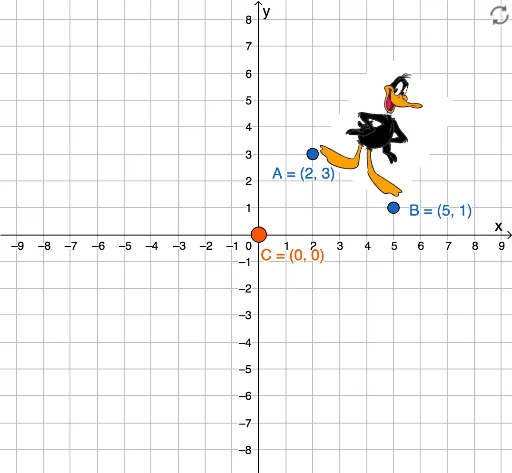
This example demonstrates how to rotate a geometric object (such as image pic2) around specified points (like C, A, B) in GeoGebra, visually illustrating the effect of a rotation transformation. The core mathematical concept is rotation in plane geometry, involving the center of rotation, rotation angle, and the positional relationship of the figure before and after rotation. Construction highlights: create points C, A, B as rotation centers or reference points, use GeoGebra's rotation command (e.g., Rotate) to rotate object pic2 around a chosen point by a given angle, and observe the symmetry between the original and rotated figures. Suitable for middle school and above students beginning to learn geometric transformations, and for teachers demonstrating rotation properties in class, such as that rotation preserves size and shape while changing position and orientation. By using sliders or inputting angles, learners can dynamically explore how the figure changes with different rotation angles, deepening understanding of rotational symmetry.
GeoGebra Commands & Parameters
Point C(0, 0)Point A(2, 3)Point B(5, 1)
AI Drawing Prompt Reference
In a coordinate plane, start by placing three fixed points: one at the origin as the rotation center, and two others to the upper right and further right as reference points. Then, position an arbitrary shape (such as a polygon or image) near the origin. Next, rotate this shape by the same angle (e.g., 90 degrees) around each of the three points separately, producing three rotated copies. The rotated copies should preserve the original size and shape, only changing position and orientation. Finally, include a slider to adjust the rotation angle dynamically, allowing observation of how the figure changes when rotated about different centers.
The prompt above was compiled from the original drawing commands and is for reference only.