
Equilateral Triangle Construction Techniques: Circles and Segments Practice
Loading the math board and drawing, please wait…
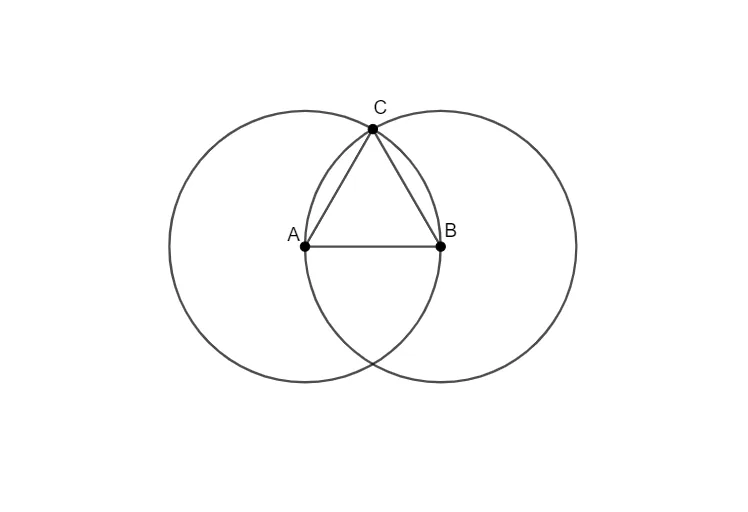
This example demonstrates how to construct an equilateral triangle using basic geometric construction techniques with circles and line segments, serving as a practice exercise in a geometry series. The core mathematical concept is the property of equilateral triangles—all sides equal—and the use of circle radii to ensure equal side lengths. Construction steps involve using the Circle command to draw circles centered at given points with radii equal to the distance between them, the Intersect command to find the intersection point of the two circles, and the Segment command to connect the intersection point with the original points, forming the triangle. Key objects include points A, B, C, circles c and d, and segments f, g, h. This is suitable for middle school geometry lessons on compass-and-straightedge constructions or dynamic geometry software practice, helping students understand the definition and construction of equilateral triangles.
GeoGebra Commands & Parameters
Circle(A, B) → cCircle(B, A) → dIntersect(c, d, 1) → CSegment(A, B) → fSegment(B, C) → gSegment(C, A) → h
AI Drawing Prompt Reference
Place two points A and B on a plane. Construct two circles: one centered at A passing through B, and another centered at B passing through A. Let the circles intersect at a point C (choose one intersection point). Then draw the segment between A and B, and also draw segments from A to C and from B to C, forming a triangle whose side lengths are intended to be equal. Keep the key objects: points A, B, C, the two circles used to locate C, and the three connecting segments.
The prompt above was compiled from the original drawing commands and is for reference only.